Creating an API token
Overview
In this guide, we are going to have a look at how to create a DocHeart API token. Creating an API token is the first step in integrating your system or application with DocHeart. DocHeart allows you to manage multiple API tokens at once and optionally set expiration dates. This is useful, as it allows you to connect multiple different applications to DocHeart from the same user account. DocHeart tracks usage statistics per API token. This allows you to split your costs in-between the different applications you connect with the same account.
Creating an API token
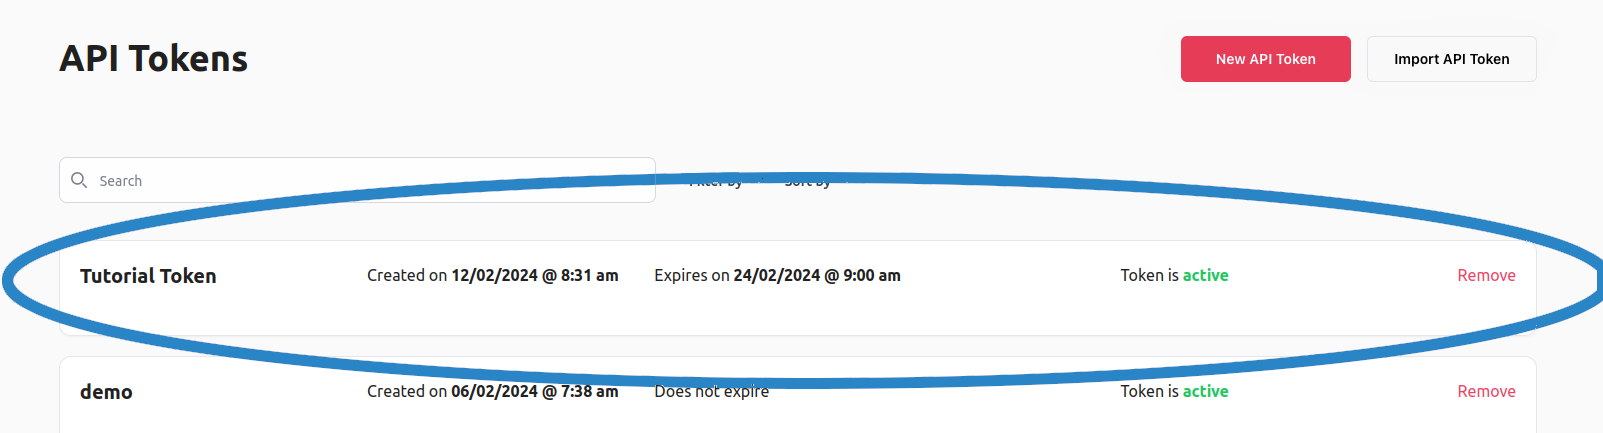
To create an API token, first log into the DocHeart web application, then navigate to the API tokens menu. You should be able to see a screen that looks similar to this:

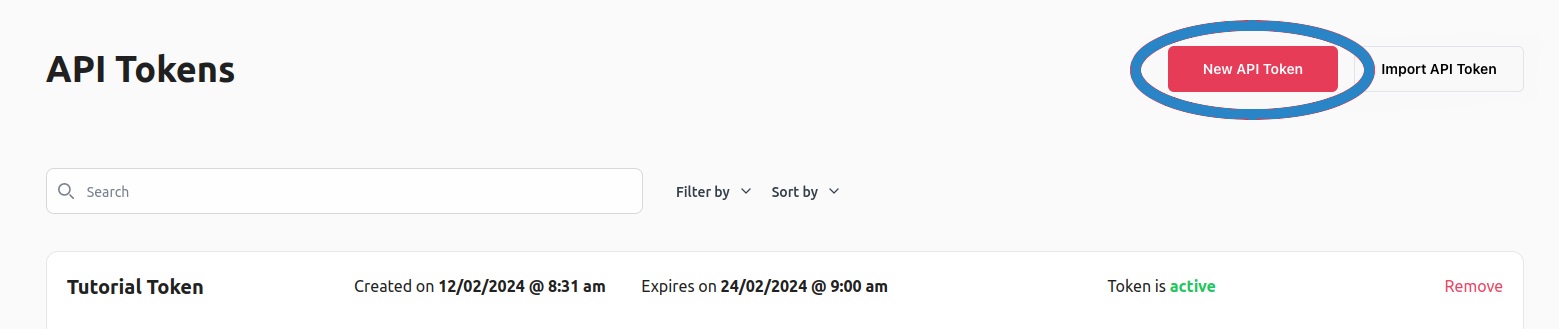
The API tokens menu contains a table listing all API tokens associated with the account. One important column to look at is Status, as it indicates whether the API token is active or expired. You can delete an API token by clicking on the Remove button under the Actions columns.
To create an API token, press the New API Token button in the header section of the page, as indicated below:
Pressing the New API Token button will open a modal that allows you to specify a name for the key as well as an optional expiration date, as in the image below:
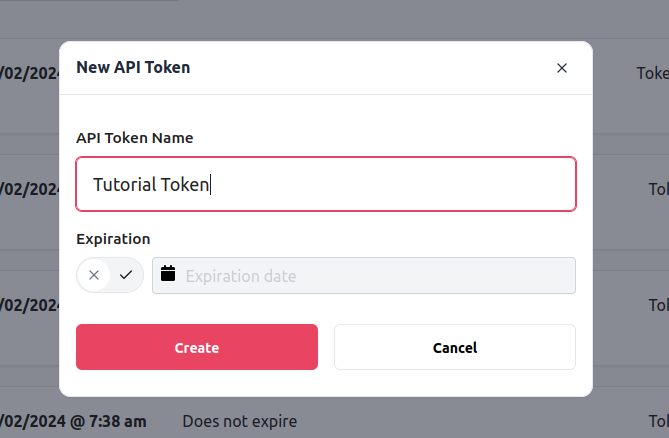
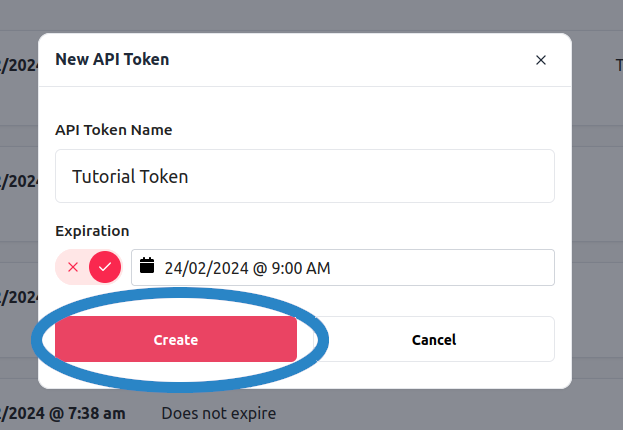
The name is only an identifier that allows you to distinguish the keys more easily. Once a key is expired, it can no longer be used and all API requests that make use of it will be blocked. When the key is fully configured, you can press Create:
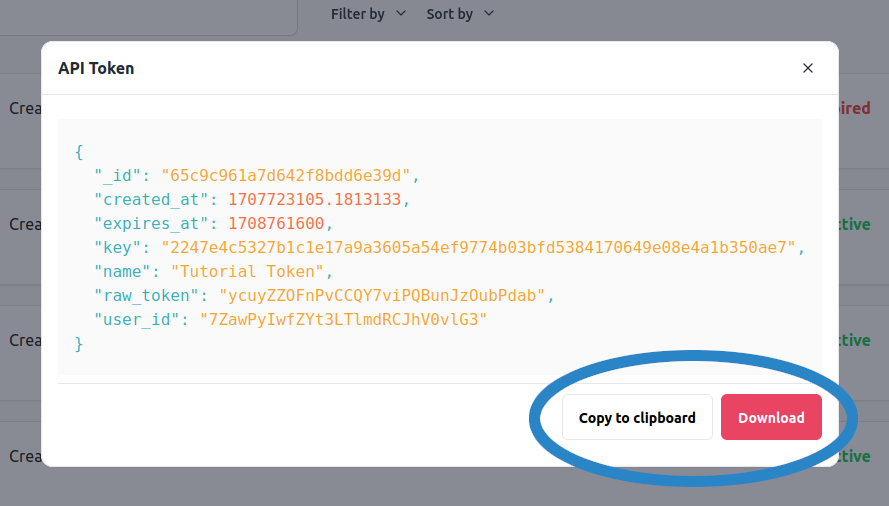
A new modal will pop up that will display a JSON object containing the key and some additional information about it:
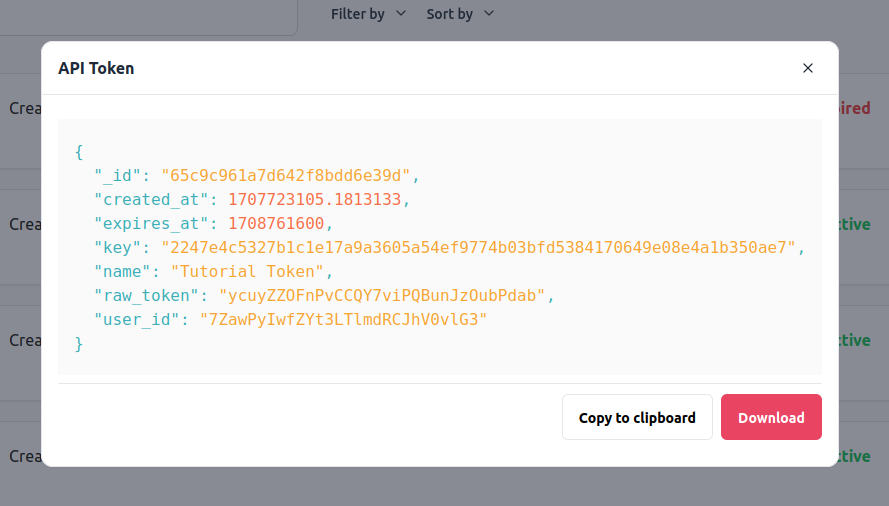
It is very important that you save this JSON object before you close the modal, as you will never have access to it again. To facilitate saving the object, you can use the modal buttons to either copy the JSON to your clipboard or download it as a file:
After you save the JSON object, you can close the modal. You will now see that the new API token was added to the table:
Using the API token
Now that we have seen how we create an API token, we will have a look at how to make use of it to authenticate an API request.
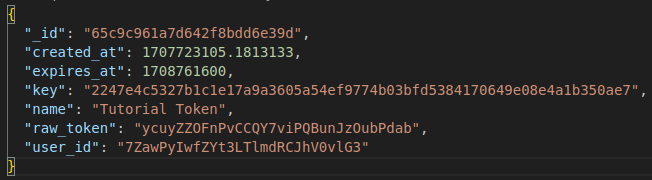
Let us first have a look at the JSON object that you have just saved when creating the API token:
The actual API token (the code that you will include in your API requests) can be found under the raw_token field as highlighted below:
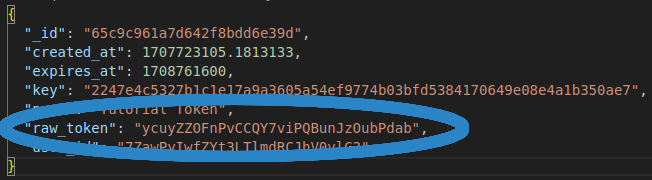
To authenticate API requests, you will take the raw token obtained from the saved JSON object and include it inside a custom HTTP header named X-api, as shown in the example request below:
-
const response = await fetch("https://api.docheart.ai/docheart/api/vault/list", { method: "GET", headers: { "X-Api": "ycuyZZOFnPvCCQY7viPQBunJzOubPdab" } }) -
curl -X GET https://api.docheart.ai/docheart/api/vault/list \
-H "X-api: ycuyZZOFnPvCCQY7viPQBunJzOubPdab"