Configuring an extraction
Overview
This guide will provide you with a step-by-step overview of how to create an extraction configuration. An extraction configuration needs to be created for every category of documents from which you want to extract data. The purpose of an extraction configuration is to instruct DocHeart what kind of data you expect to extract from a certain category of documents, as well as from where in the document to extract it. Creating a configuration is a step-by-step process, that starts with uploading an example document, a document that is representative of the category of documents you expect to process with the created configuration. At the end of the configuration creation process, DocHeart allows you to see a preview extraction, which is a mock extraction performed on the uploaded example document. The preview functionality enables you to check that the configuration you have just created works as intended and to make the necessary changes in case it doesn’t. In light of all of these, the following sections will provide a detailed walkthrough on how to create a configuration.
Creating a new configuration
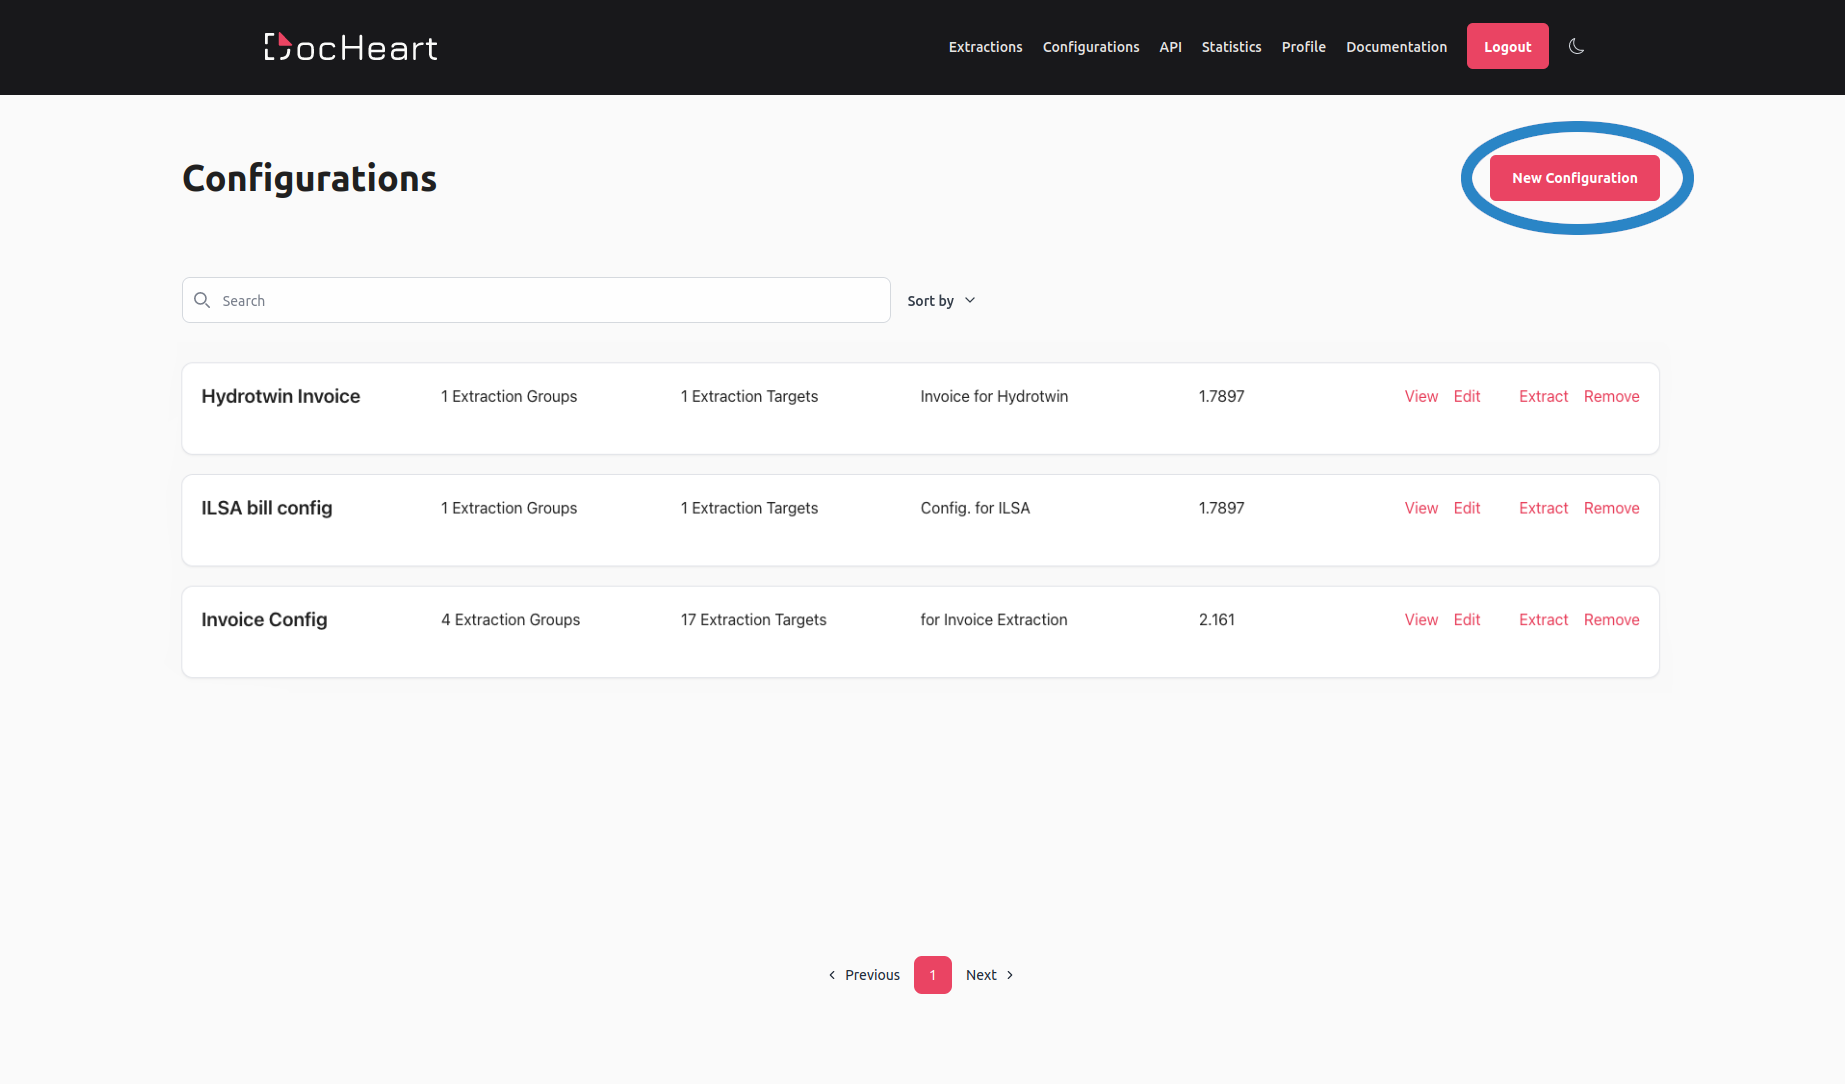
To create a new extraction configuration, you first need to navigate to the Configurations Menu, which provides you with a list of all already existing configurations. Once you are there, press the New Configuration button, as indicated below:
Pressing the New Configuration button will open up the configuration wizard, which is a step-by-step menu guiding you through the creation of the extraction configuration.
Setting up the initial configuration details
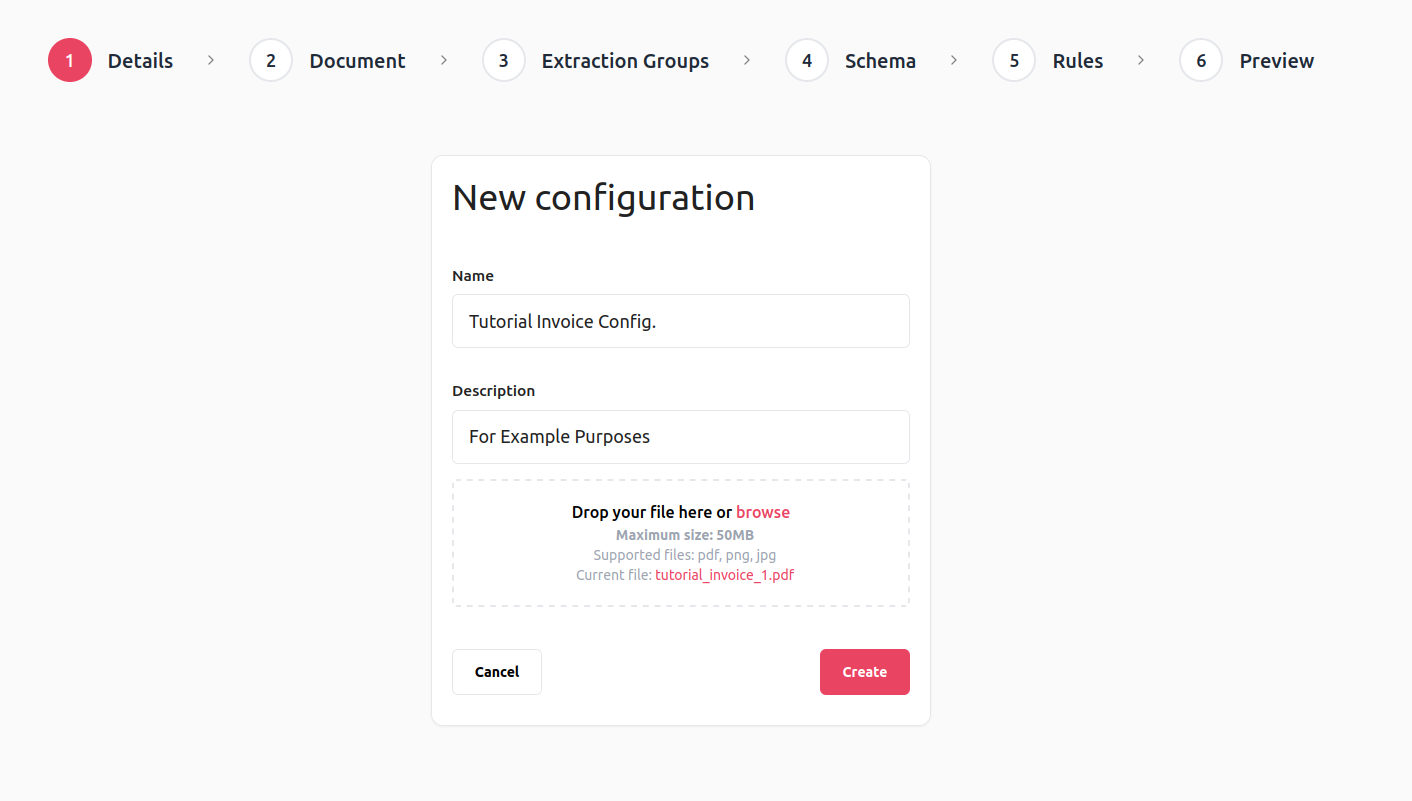
The first step in creating the configuration is setting up the initial details, which are:
- Configuration name - unique name used throughout the application to reference the configuration
- Description - a piece of text that describes what this configuration is used for. The description does not have a functional use.
- Example Document - a document which is representative of the category of documents you plan to extract using the configuration. The example document is used as a helper when defining the search areas, but also as a target for preview extractions, which are used to check that the configuration is correct.
The image below illustrates setting up the initial configuration details:
To be able to follow through the configuration process yourself, you can download the document we used in our example and use it as well.
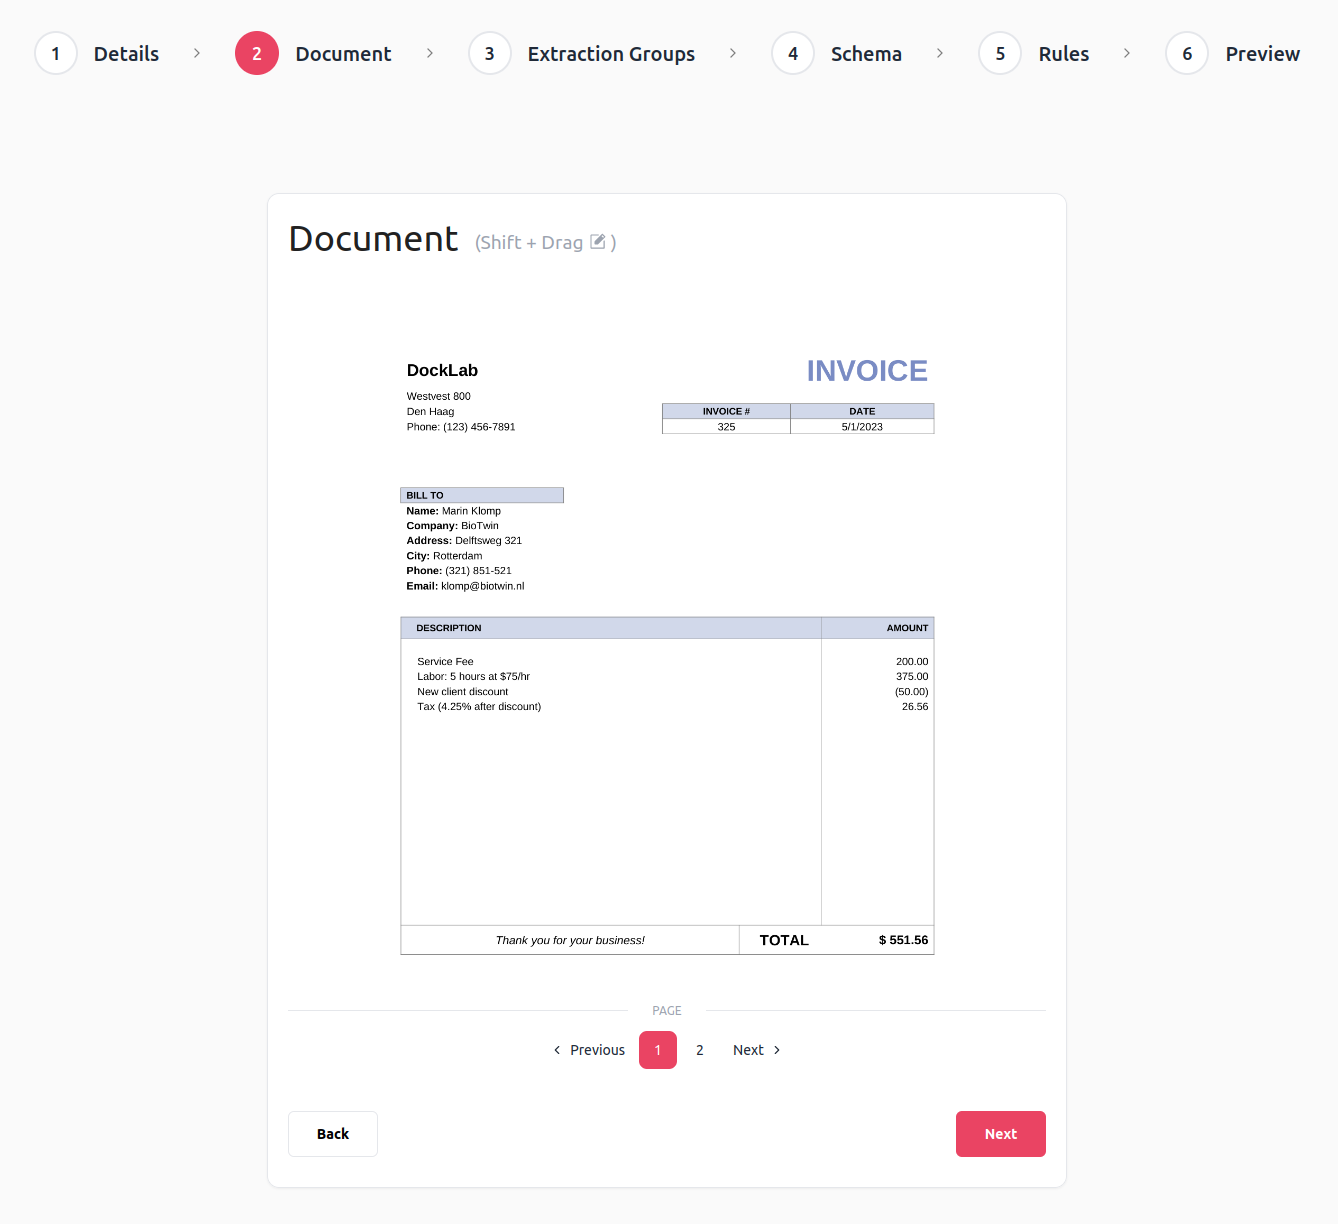
Defining the search areas
The next step is defining the search areas. Search areas consist of bounding boxes defining the parts of the document you want to extract data from. The use of search areas is optional, as you can always search for data fields in the entire document. However, using search areas can be helpful, as it can make the search more fine-grained and, hence, obtain more accurate extraction results.
Below you can find the search area definition screen:
To create a search area, you need to drag over the document with the cursor while pressing Shift. This will create a pop-up that allows you to define the name of a search area. The search area name will be used to reference the search area later in the configuration wizard. The step we have just described is illustrated in the image below:
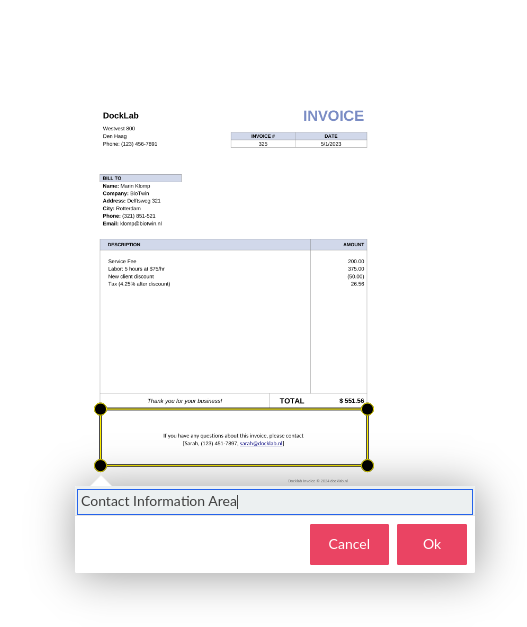
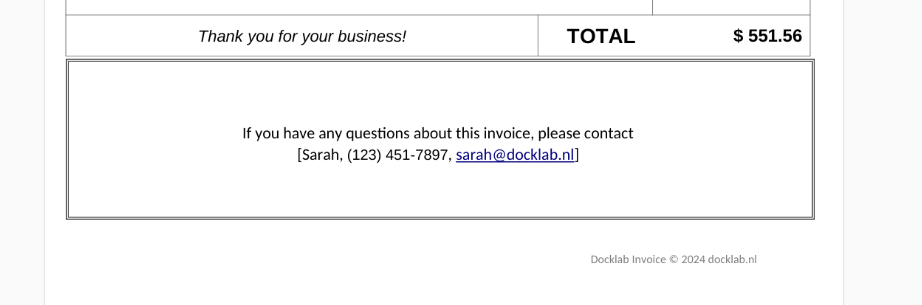
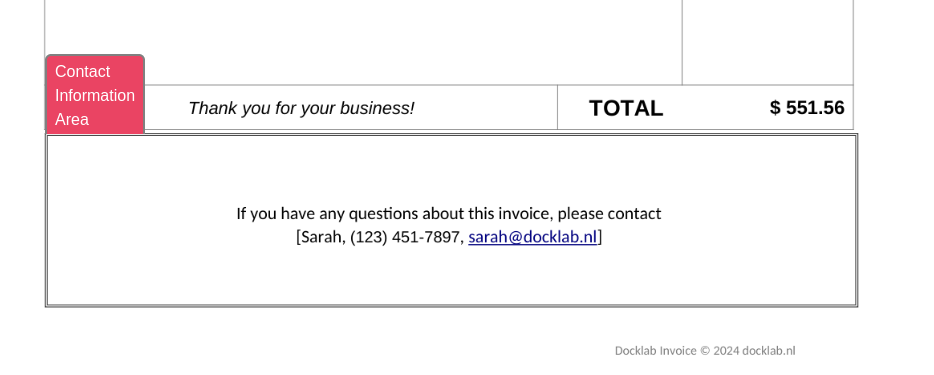
Once you are happy with your search area, you can press ‘OK’ to save it. For the purpose of our example, we defined one search area for the contact information.
Search area by page indices
Search areas by page indices work similarly to bounding box search areas but allow you to specify which pages of the document should be searched for data extraction, rather than scanning the entire document. While the system can automatically search all pages, defining specific page indices helps target relevant sections, enhancing precision. This is especially useful when the target data is located on specific pages, making extraction more efficient and accurate. Using search areas by page indices is entirely optional. You’ll learn more about this in the next section.
Creating the extraction groups and fields
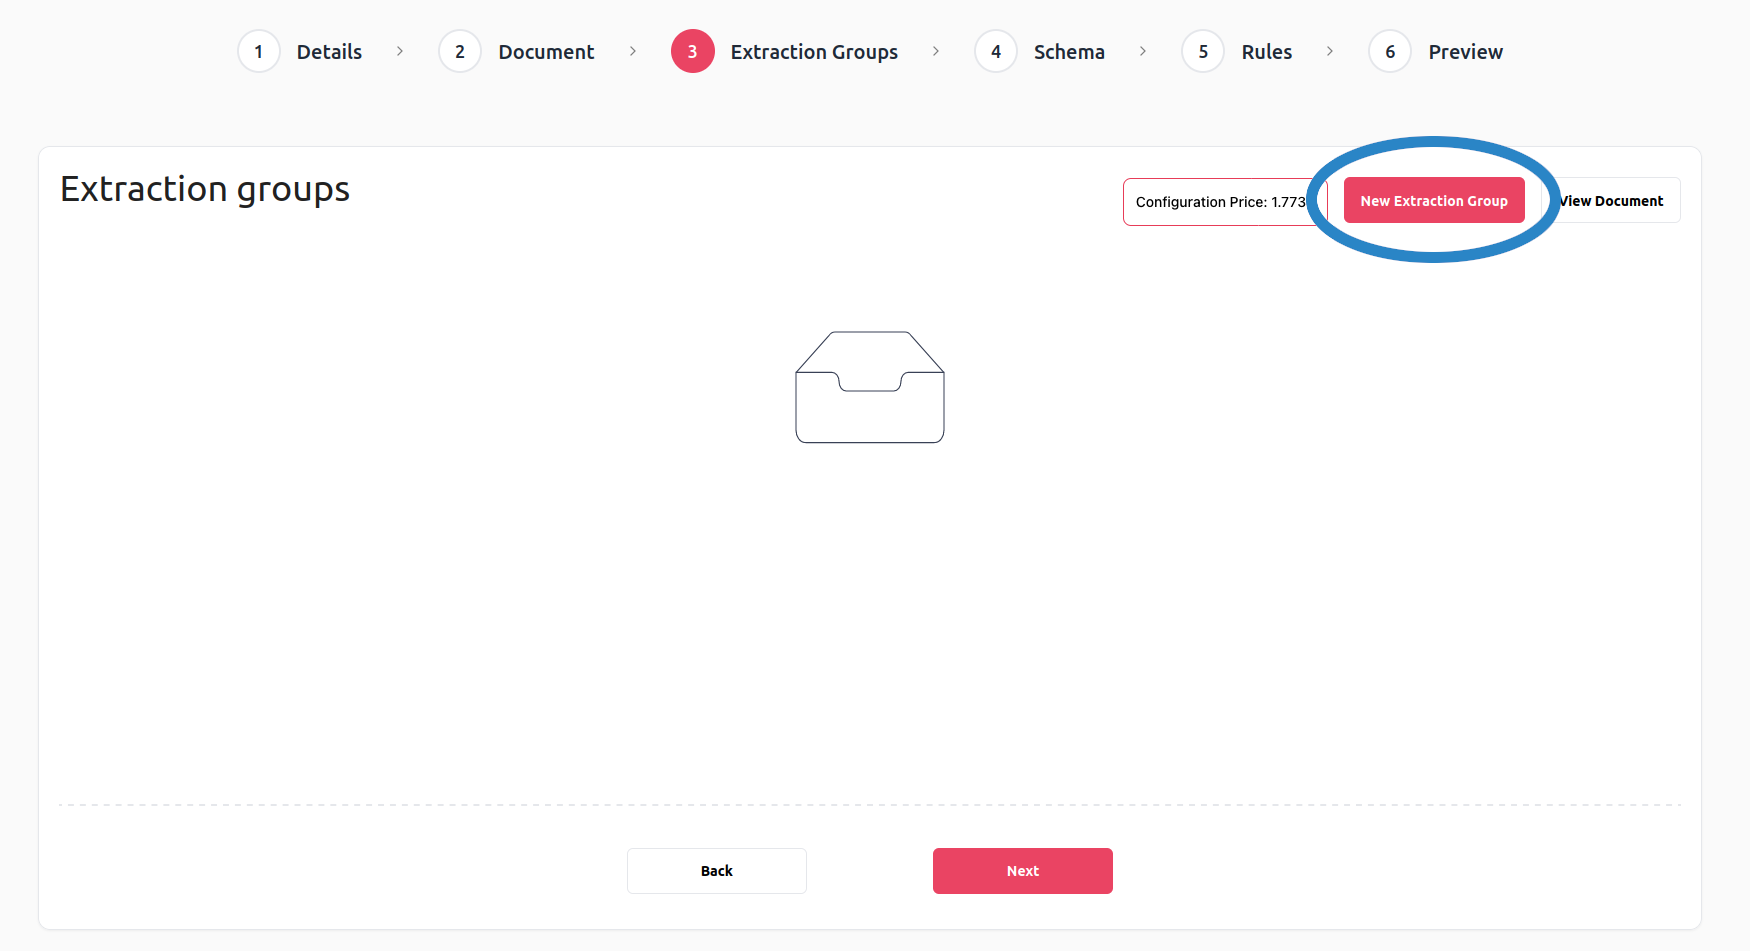
This is the most important step in the configuration process, as in this step you define what you want to extract using this configuration. The data that you are extracting is logically organized into extraction groups, which, as the name suggests, group together extracted data that is related. What kind of extracted data is included in one group or another is completely up to you to decide, however, since DocHeart gives you a lot of freedom to tailor the data extraction process to your needs. To create a new extraction group, press the New Extraction Group button, as indicated in the figure below:
Having said all of these, what is important to understand is that there are 2 types of extraction groups: groups for field extraction and groups for table extraction. We will go through how to define each of them in the subsections below:
Defining a field extraction group
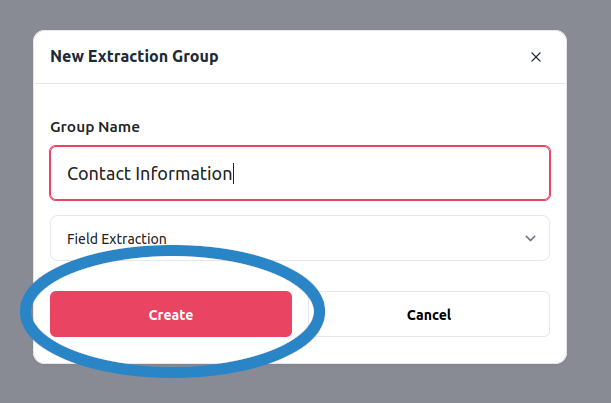
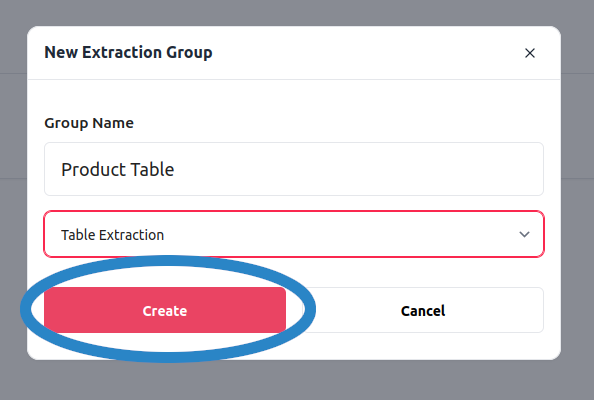
A field extraction group contains one or several fields that you expect to extract from the document. You can create a new field extraction group by pressing the New Extraction Group button and then selecting Field Extraction as an option in the dropdown of the creation popup, as indicated by the images below. Once you have also chosen a name, you can press ‘Create’ to create the new group.
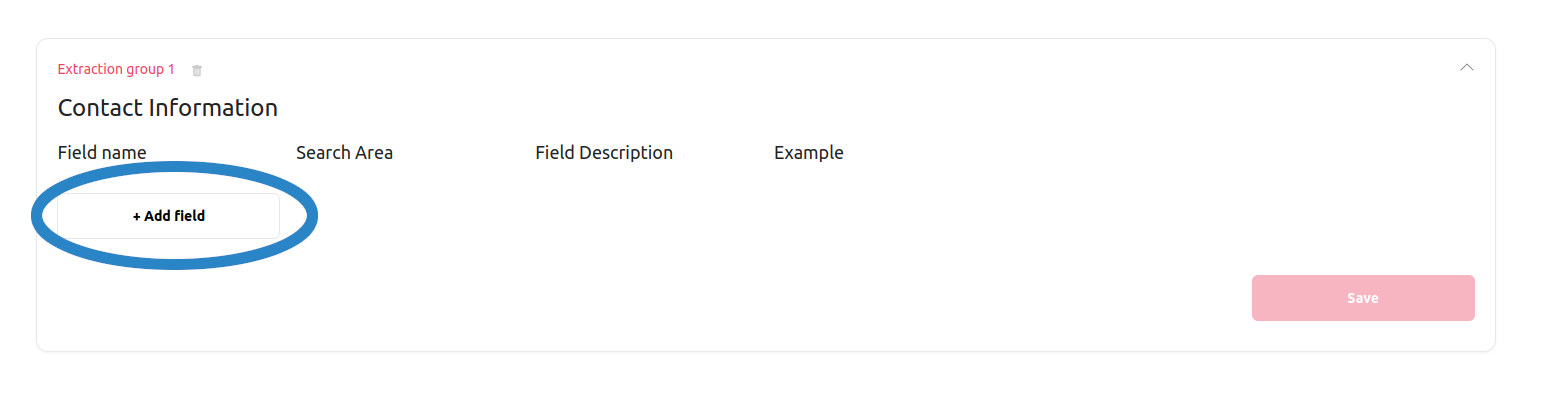
The next step is to define the fields that make up the extraction group. You can do that by expanding the extraction group and then pressing the Add field button, as illustrated below.
To define a field, you need to specify the following information:
- Field name - the name used to identify the field throughout the application.
- Search area or Page Indices - You can either select all to search through the whole document, or specify a bounding box search area or search area by page indices to search in a specific area or page.
- Field description - the field description is very important, since it is used by Docheart to identify what data to extract for the field we are currently defining. The field description should be a natural language description of the data we want to extract. Since DocHeart relies on Large Language Model Technology, it can understand and perform action based on human natural language.
- Field example - the field example is also important for the extraction, as it helps DocHeart better identify the kind of data that we expect to extract. The field example should be an example of how some piece of data extracted for that field would look like. We recommend not to use the same data as in the example document, since doing so would be detrimental when verifying that the defined configuration works as intended.
- Allow multiple values - this boolean field specifies whether or not you expect to extract one or multiple values that match the field’s description and example.
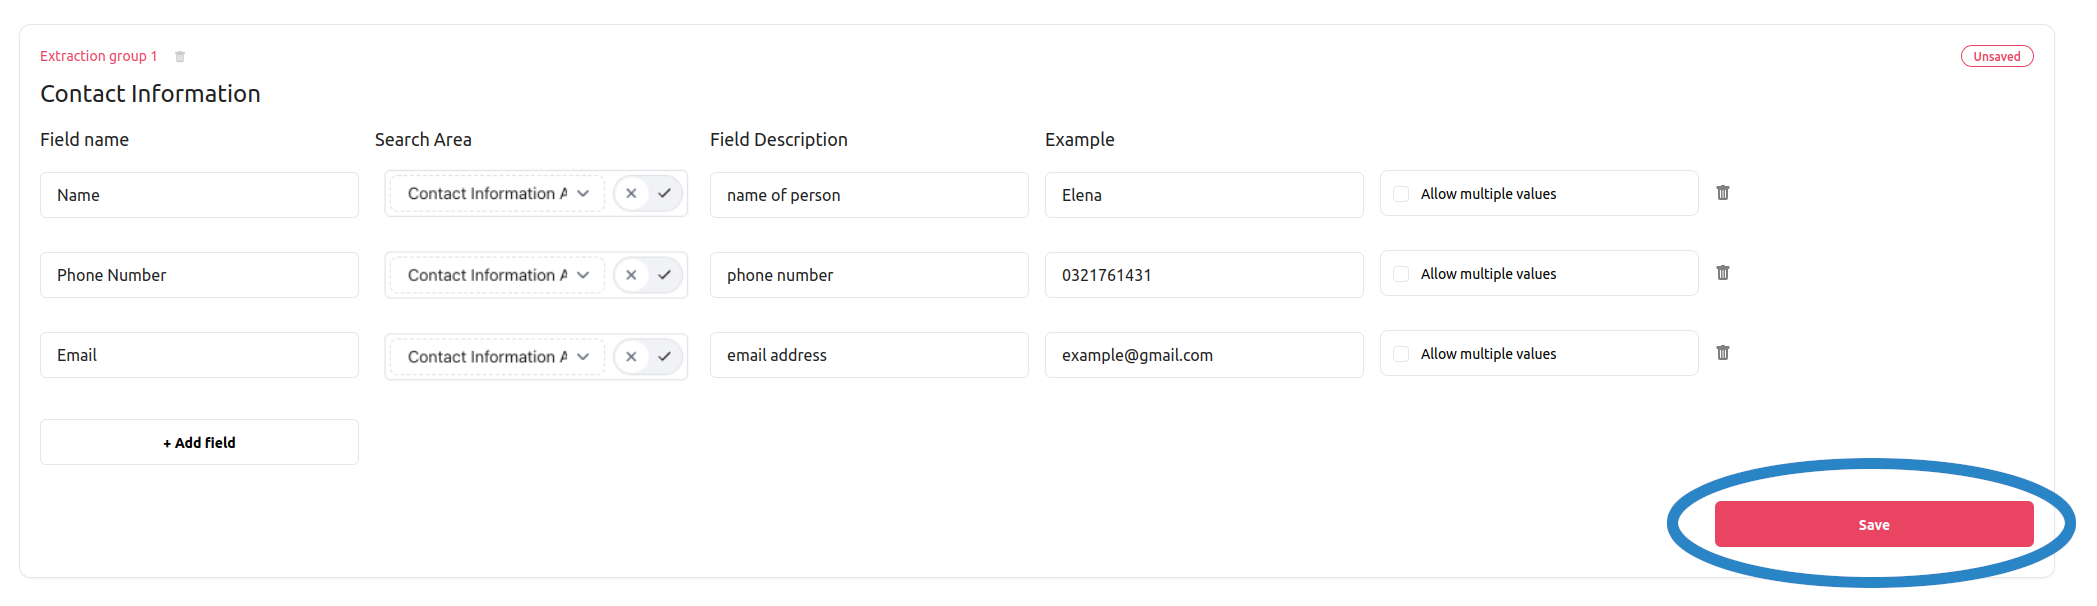
Since we are looking to extract 3 fields: the name of the contact person, his/her phone number and his/her email address, we will define the fields accordingly, as illustrated in the images below.
Search area from where we extract the contact details:
The field definitions for the Contact Details field extraction group with the Bounding box search areas:

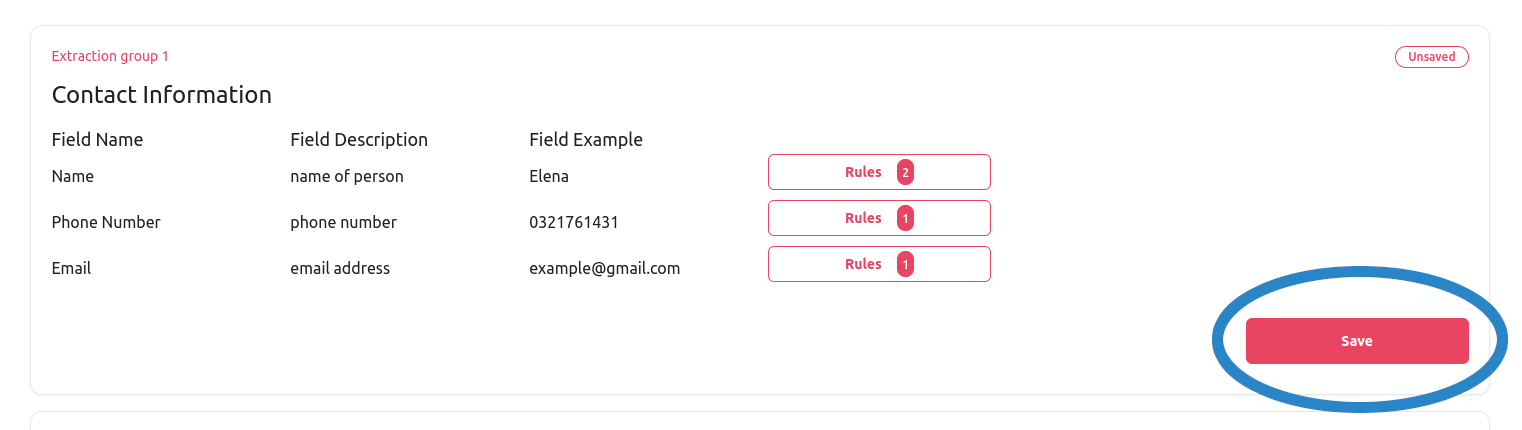
Once you are done with defining all the fields, don’t forget to press the Save button, to save all the changes made to the group:
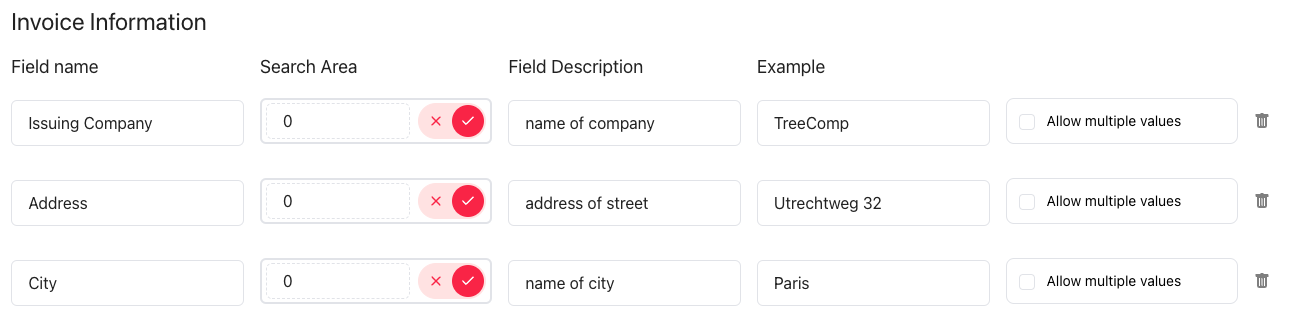
The field definitions for the Invoice Information field extraction group with the Search areas by page indices, in the search area section, toggle the switch to page indexing and specify the page indices from which page you want to extract the data:
Defining a table extraction group
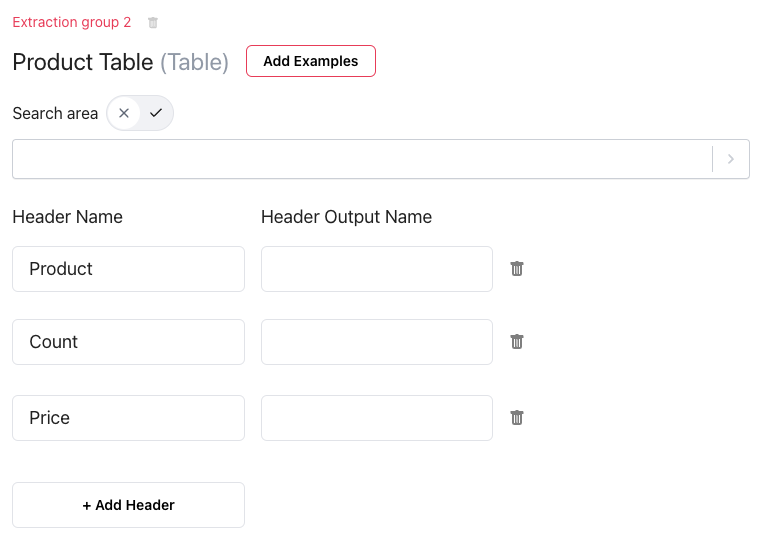
The next step is to define a group used to extract tables in the document. Creating a table extraction group is analogous to creating a field extraction group, with the difference that in the creation popup you need to select the table extraction option, as shown below:
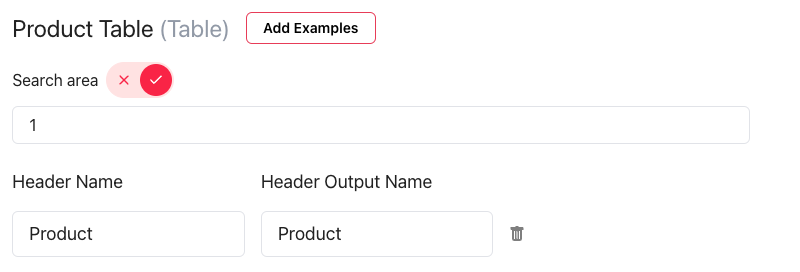
Defining a table extraction group consists of defining the table headers, specifying the headers you want to extract, along with the corresponding header output names. And creating a bounding box around the table or providing the document page index. Optionally, you can also provide an example table structure. You can extract larger tables or tables that span multiple pages as a single table by selecting multiple bounding search areas or providing the document page index.
Create a search area bounding box around the table you want to extract, as indicated below:
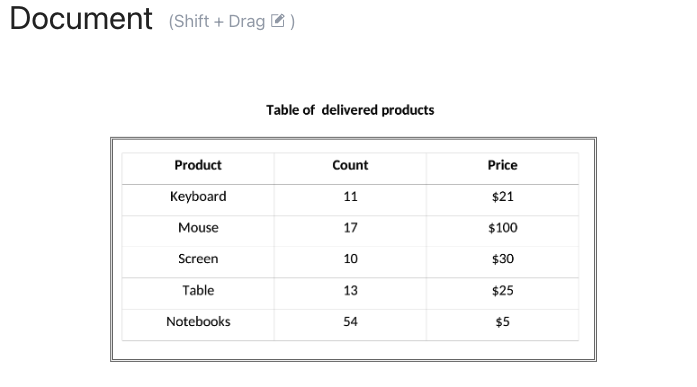
Table extraction group with 3 headers:
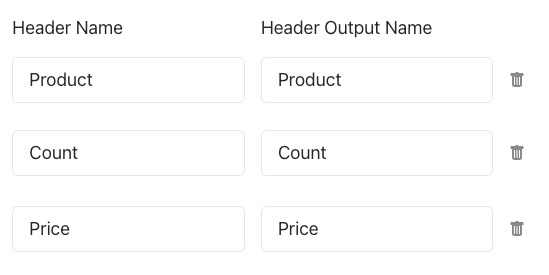
Specify the header output names:
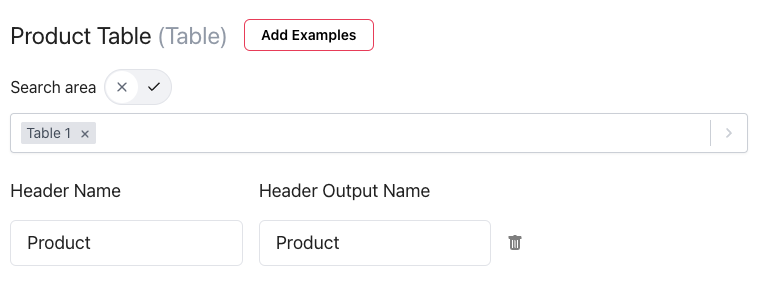
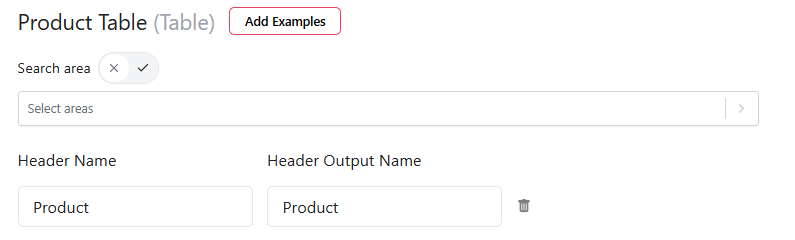
Select the search area:
Or select the page index:
Or leave it empty to look through the whole document
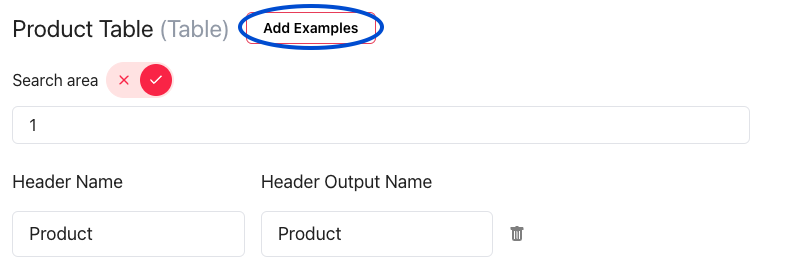
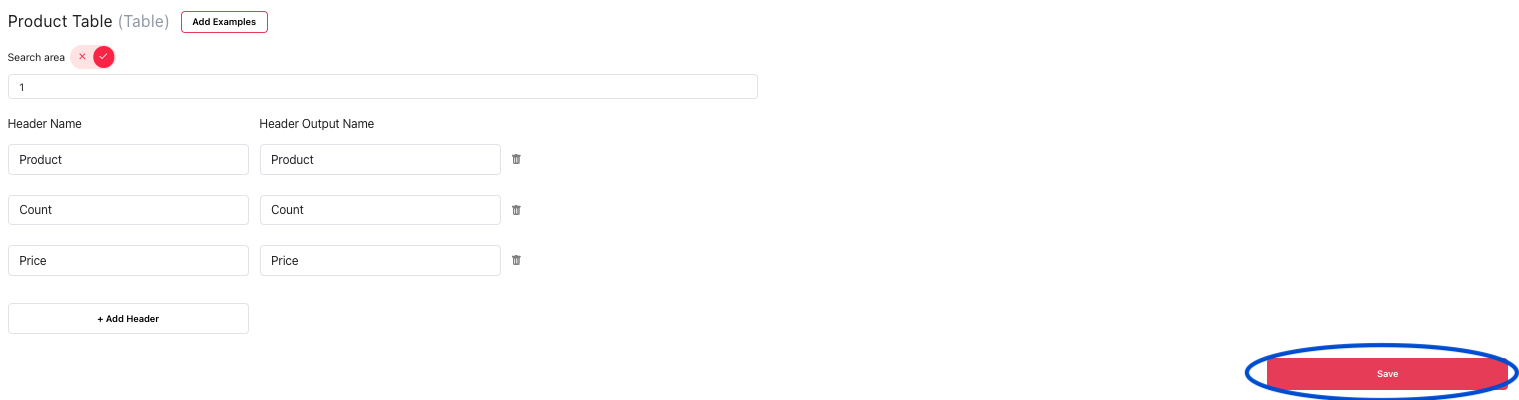
You can optionally add table examples. To add the examples, click on the Add Examples button, as shown below:
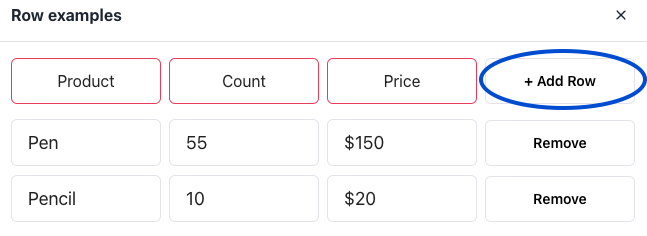
Add the table examples, then click on the +Add Row button to create a new table row:
Once you are done with defining all the table headers and examples, don’t forget to press the Save button, to save all the changes made to the group:
Defining a checkbox extraction group
The next step is to define a group used to extract checkboxes in the document. Creating a checkbox extraction group is the same as creating other extraction groups, with the difference that in the creation popup, you need to select the Checkbox Extraction option, as shown below. Once you have also chosen a name, you can press ‘Create’ to create the new group.

The next step is to define the fields that make up the extraction group. To define a field, you need to specify the following information:
- Checkbox field name - the name used to identify the field throughout the application.
- Query - specifies a question or a query to answer based on checkboxes in the document
- Labels - Comma separated string of possible answers/labels to the query. those will be used to answer the query
- Search Area - The indices of the pages where the checkboxes are to be found. use
:to include all the pages.
We Will define an checkbox extraction field, as illustrated in the images below.

Once you are done with defining all the checkbox fields, don’t forget to press the Save button, to save all the changes made to the group:

Optionally defining an output schema
To improve ease of integration, you can add a custom output schema. The custom output schema is used to define a custom format in which the extracted data will be outputted by the DocHeart API. You can make use of this feature to speed up the integration process, by making the output more similar to your internal data models. The output schema can be created using our built-in output schema editor. You can check the documentation to learn more about the output schema definition language (OSDL) as well as how to define a schema.
Adding automatic validation rules
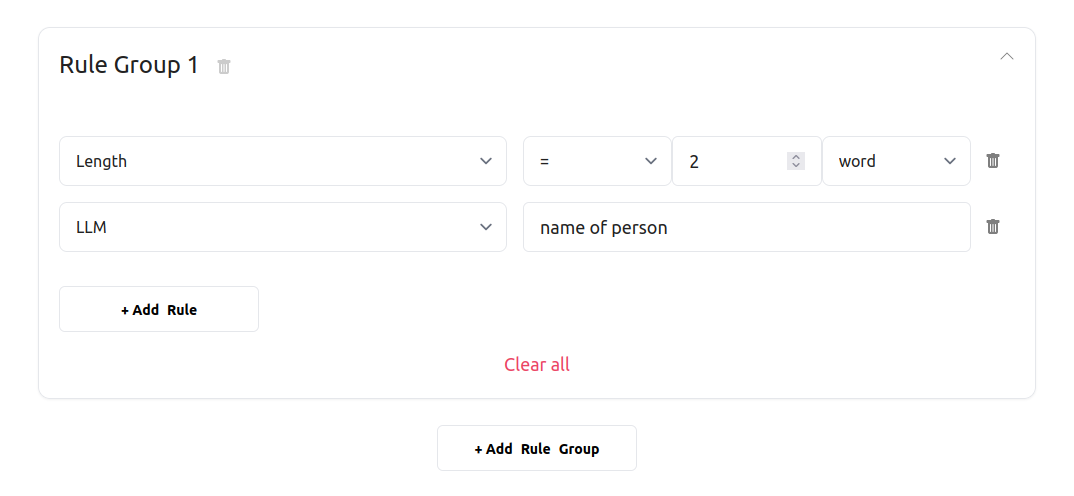
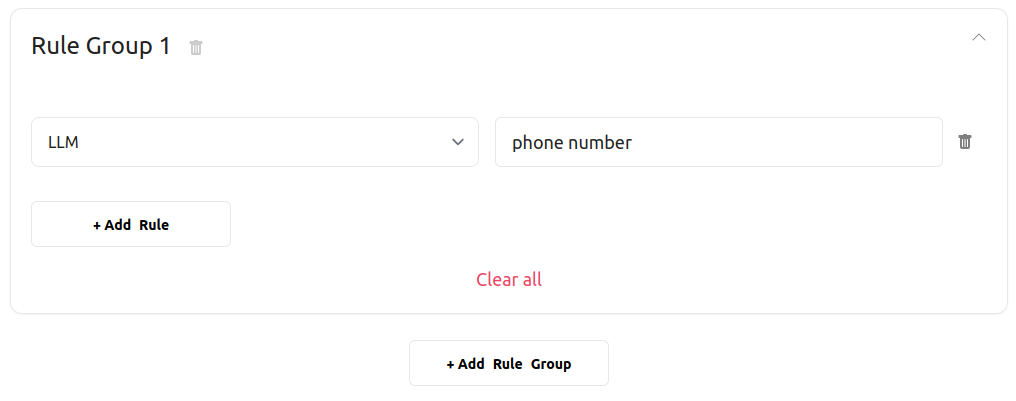
DocHeart allows you to associate validation rules to all defined extraction fields and table headers. The role of the automatic validation rules is to automatically flag extractions that went wrong. Whenever the value extracted for a field fails a validation rule, DocHeart will inform you about it in the returned extraction results. DocHeart’s validation engine is complex and it enables users to define arbitrary logical expressions. To learn more about the capabilities of DocHeart’s validation engine, you should read the documentation for the Validation API.
Rules Screen:
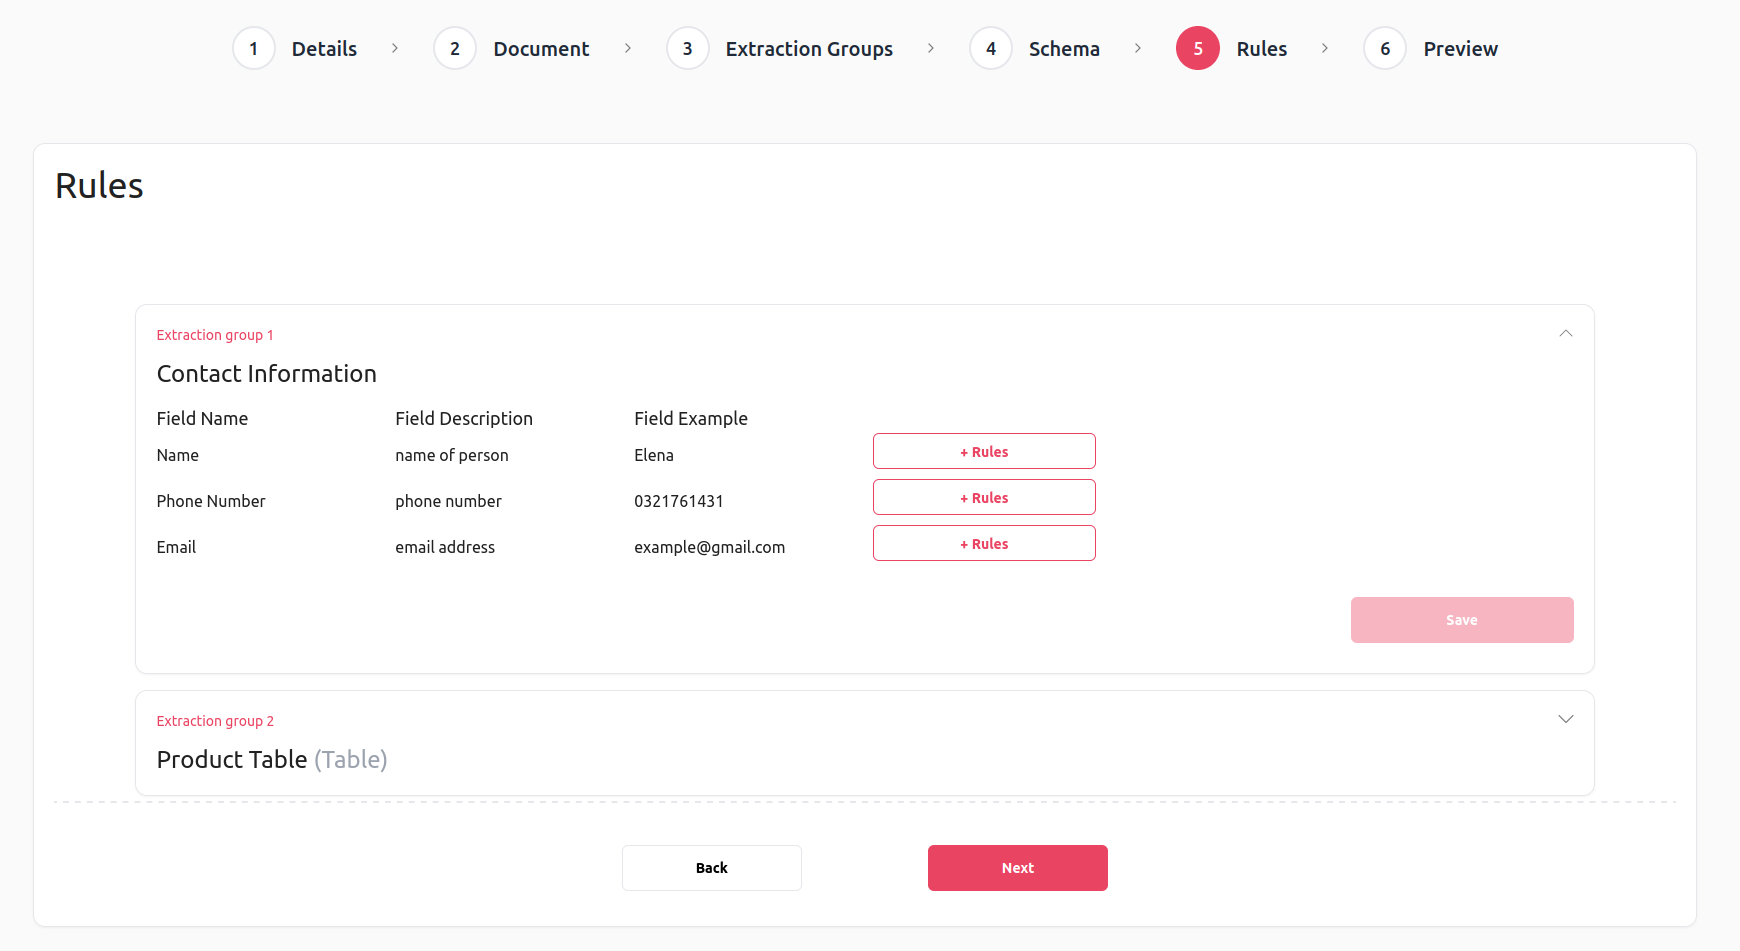
We define very simple validation rules for contact detail fields, telling DocHeart that we expect:
- a person’s name made up of 2 words
- a phone number
- an email address
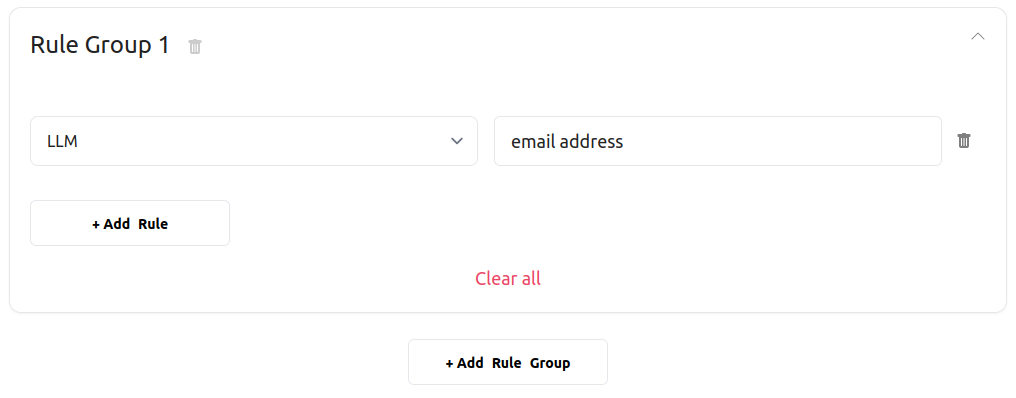
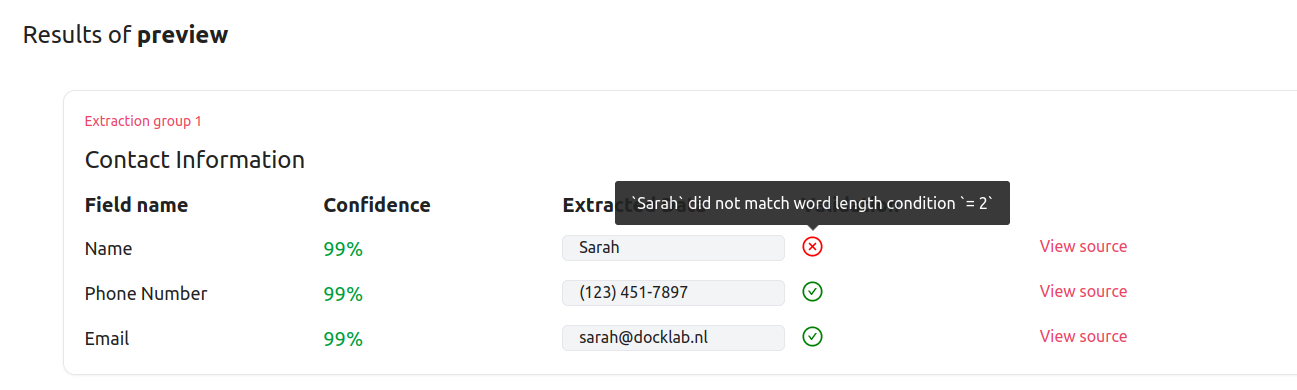
What you might have noticed is that while the validation rule expects two-word names, our example document contains only a one-word name. This was done on purpose to showcase how it looks like when a validation rule fails.
Once you are done defining all the validation rules, don’t forget to press the Save button so that the changes are saved.
Generating an extraction preview
The final step of the configuration wizard is generating an extraction preview. The purpose of this step is to perform a mock extraction to verify that our created configuration works as intended. To generate a preview, you need to press the Generate preview button, as indicated below:

Performing the extraction will take a couple of seconds, but once it is done, the results will be displayed on the preview screen, as shown below:
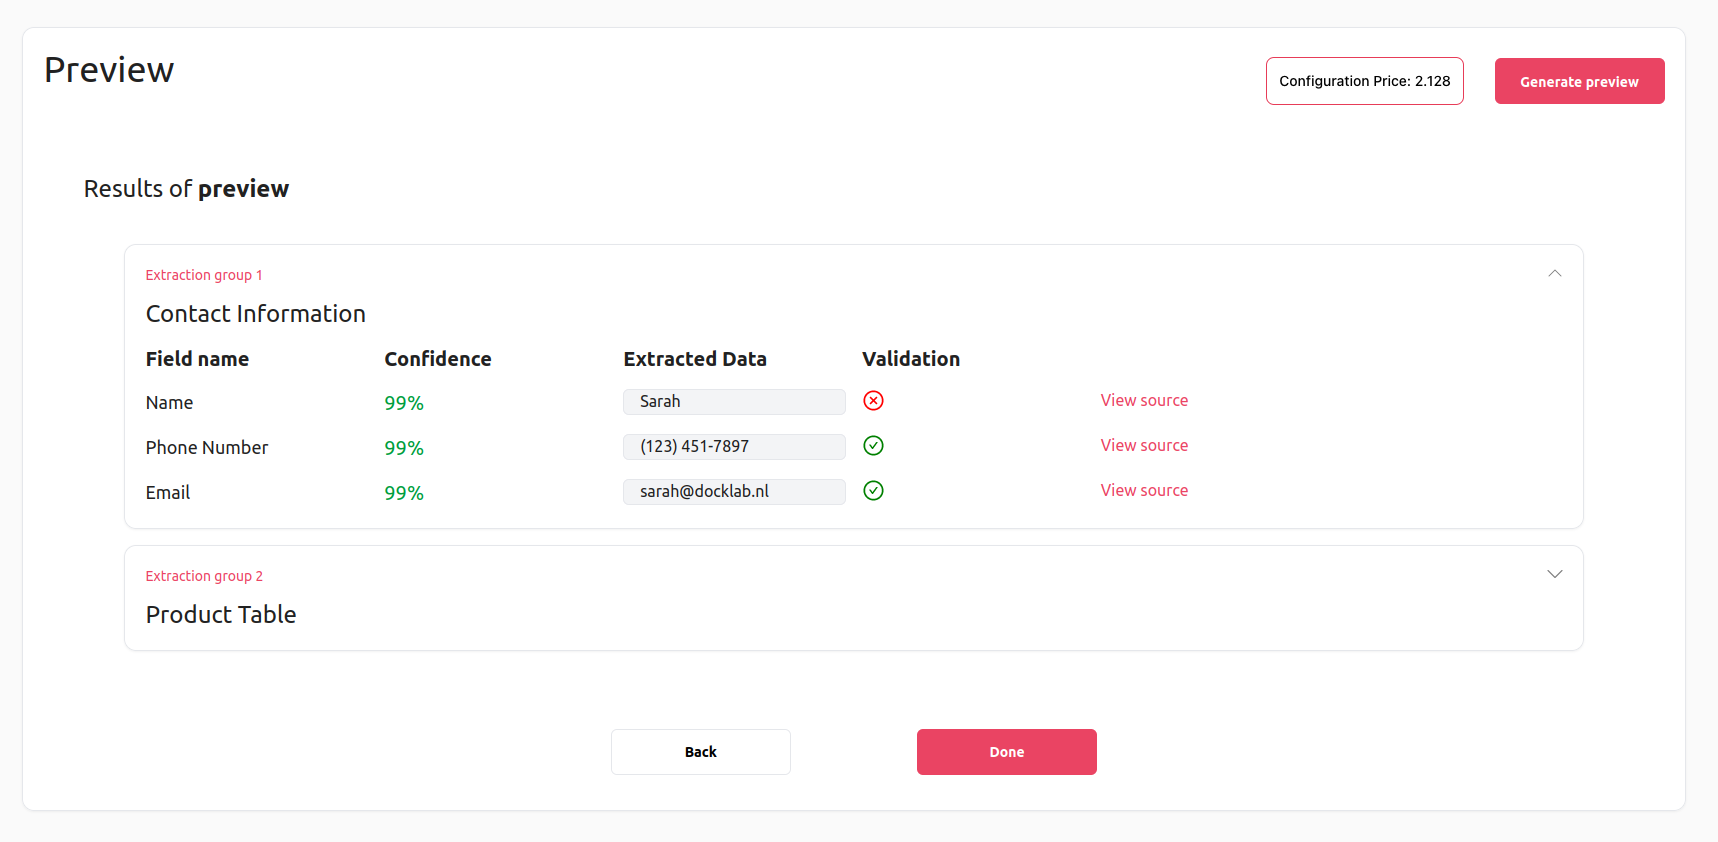
When validation fails will be indicated by a red icon located on the same row as the field that didn’t pass the validation. Hovering over the red icon will provide more details about the reasons why the validation failed.
If you are not happy with the results of the preview extraction, you can always go back, perform the necessary changes to the configuration, and then navigate again to the preview screen to see the outcome. Whenever you want a new preview extraction to be performed, make sure to press the Generate Preview button.
Now that we are done creating an extraction configuration, it’s time to put it to good use, which will be presented in the next section of this tutorial.